FLUX.1 + LoRA for styled image generation
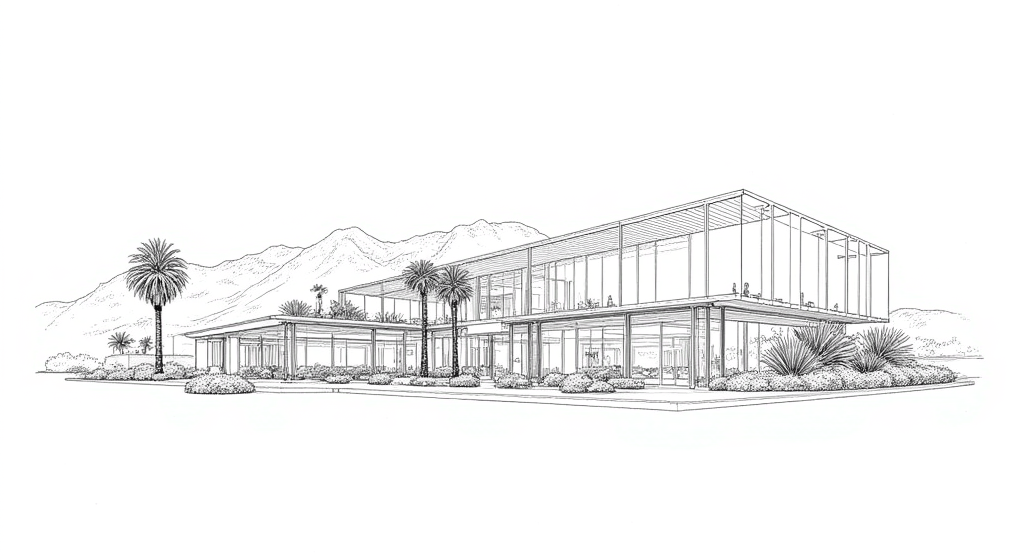
Prompt: techlinedrawing, a drawing of a glass-heavy, modern architecture that Californian venture capital firms like, with fine details and mountains in the back, white background.
Besides playing the Elden Ring: Shadow of the Erdtree DLC and Black Myth: Wukong on my gaming rig, I’ve also been playing with open weights generative AI models lately. As always, I’m more than impressed by the speed of innovation in this space.
For text generation models, at the moment (September 2024), I still feel the output quality has a bit of a bottleneck on the type of foundation models we can use and run with limited VRAM at an acceptable speed. This may change any day in the future, though, so I’m turning my attention to the latest image generation models. Of course, I need to try Flux.1 from Black Forest Labs.
Theoretically, you only need to write a simple Python script to call the Diffusers package to run the model. I still chose to use a web GUI here because it’s nice to have an automated, no-code solution with a frontend for workflow construction and submitting prompts.
The results feel decent for the minimal number of things I tried. You likely need to experiment with different random number seeds and different prompts to get there, so it’s important to have a good GPU or good patience.
Technical setup guide
At the time of writing, the setup process to get things running is not exactly apparent, so I will document it here. This has been tested on a Windows PC with an RTX 4090 (24GB VRAM).
Download web GUI software
There are many options, but I will use a simple one (ComfyUI) as an example. It has a built-in Python with essential dependencies like PyTorch and Diffusers. It might not be security best practice to blindly trust code and binaries on the internet, but hey… make sure to do your own audit. The workflow editor frontend is built with their fork of litegraph.js.
Download models
- Download
flux1-dev.safetensorsandae.safetensorsfrom black-forest-labs/FLUX.1-dev on Hugging Face. There is also a commercial-friendly model FLUX.1-schnell. - Download
t5xxl_fp8_e4m3fn.safetensorsandclip_l.safetensorsfrom comfyanonymous/flux_text_encoders. - (Optional) Download your preferred LoRA model (
.safetensors) from FLUX.1-dev adapters for particular styles (there are 4,000+ of them). I used jeremytai/techlinedrawing for the example image at the start of the post.
Place models in the correct directory
ComfyUI/models/unet/: placeflux1-dev.safetensorsComfyUI/models/vae/: placeae.safetensorsComfyUI/models/clip/: placet5xxl_fp8_e4m3fn.safetensorsandclip_l.safetensorsComfyUI/models/loras/: place your LoRA model’s.safetensorsfile
Run the foundation model
- Run
run_nvidia_gpu.bat - Drag the image on the ComfyUI Flux examples page into the ComfyUI page to import the Flux workflow.
- Select the correct files in the interface:
- Load Diffusion Model - unet_name:
flux1-dev.safetensors - DualCLIPLoader - clip_name1:
t5xxl_fp8_e4m3fn.safetensors, clip_name2:clip_l.safetensors - Load VAE - vae_name:
ae.safetensors
- Load Diffusion Model - unet_name:
Now, the workflow is ready to run. Click “Queue Prompt” to generate the example image with the default prompt and seed. It took about 10 seconds on my machine.
Add LoRA node to the workflow
- Right-click on canvas, and select Add Node > loaders > Load LoRA.
- In the new node, select lora_name as the LoRA model file name (
.safetensors). - Insert the “Load LoRA” node between the “Load Diffusion Model” node and
the “BasicGuider” node, to do this:
- Connect the Load diffusion model node’s
MODELoutput to the Load LoRA node’smodelinput. - Connect the DualCLIPLoader node’s
CLIPoutput to the Load LoRA node’sclipinput. - Connect the Load LoRA node’s
MODELoutput to the BasicGuider node’smodelinput. - Connect the Load LoRA node’s
CLIPoutput to the CLIP Text Encode (Positive Prompt) node’sclipinput.
- Connect the Load diffusion model node’s
Write the prompt with the LoRA adapter’s “trigger words”. The words are often
listed in the README.md files of the LoRA repos.
Click “Queue Prompt” to generate images. If you click it many times, they
will be queued and generated sequentially. Besides displaying on the interface
once, all generated images will be stored in ComfyUI/output.

To exit, press Ctrl + C in the terminal and then press Y.
Now I’ve done it — writing my first “open source AI” blog post! 🤗